
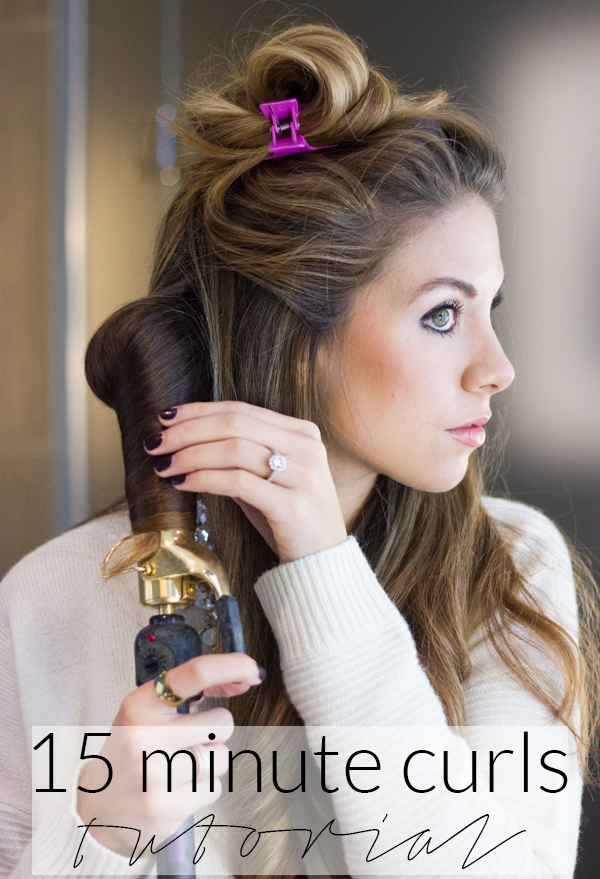
One of my favorite hairstyles is simple loose curls. It’s the style I wear almost daily, and it’s one that I can achieve in 15 minutes. It took me years to finally figure out how to curl my hair without it being “too curly” and I want to share with you a few tips and tricks to achieve loose curls that will stay all day. Here are the steps:
And yes, your hair can hold curls!
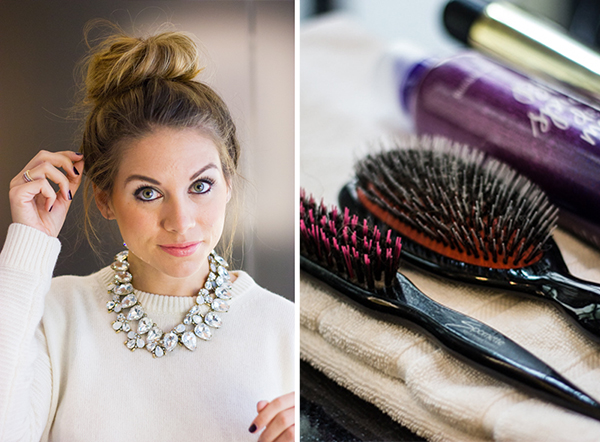
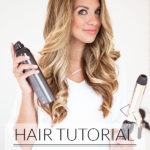
What You Need:
Boar Hair Brush (only $12!)
Hot Tools 1 in. Curling Iron (on sale for $30)
Hairspray (I used Bumble and Bumble Spray De Mode)
Step 1: Go to bed with wet hair. Letting your hair air dry is the best kept secret to helping hair hold curls. I use one pump of Drybar 100 Proof Treatment Oil when its wet and brush with a wide tooth comb. I throw my hair up in a messy bun and let it air dry over night.
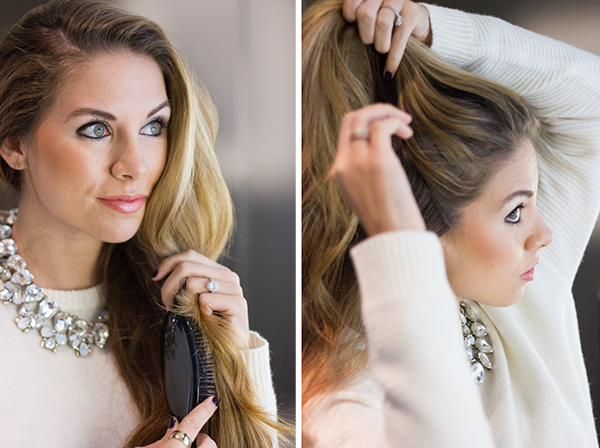
Step 2: Depending on hair texture, you may or may not want to add a little more of the 100 Proof Oil. Obviously I color my hair so it can always use a little moisture. Brush your hair out using a boar bristle brush (it’s better for your hair and prevents breakage). I section off my hair by taking the top layer and clipping it up. This helps me focus on curling the bottom layer.
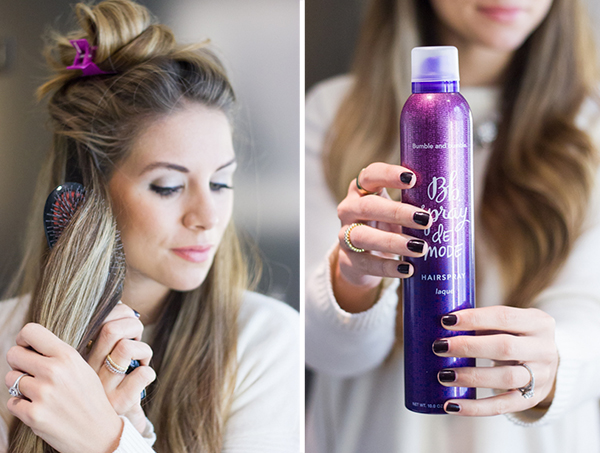
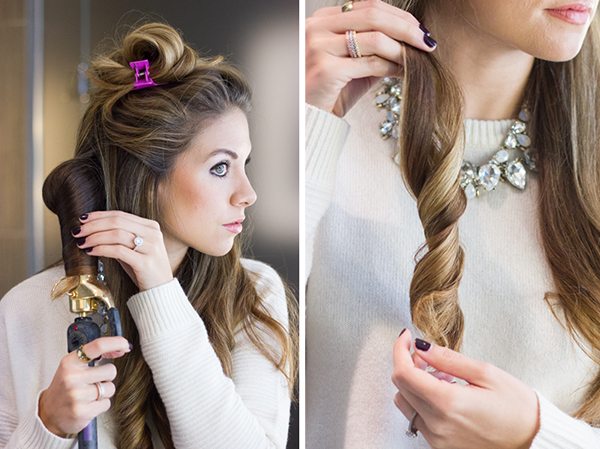
Step 3: This part takes me about 6-7 minutes. I start by taking an inch or so of my hair and spraying the section with hairspray. I like that one because it has a heat protectant and its a medium hold. Curl you hair away from your face and make sure you hold the iron vertically. You should get a tight curl, but don’t run your fingers through it yet! You will save that for the very end.
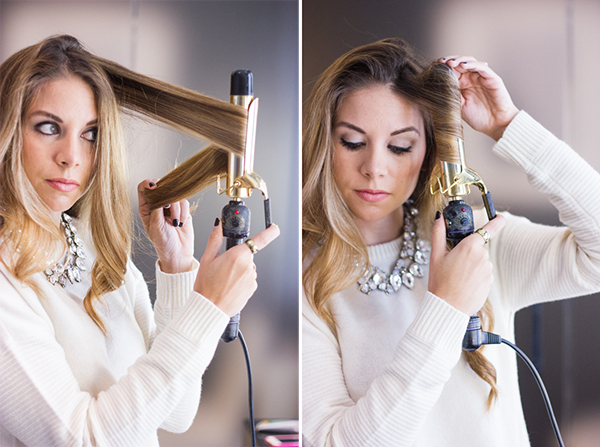
Step 4: Continue the bottom layer, and move on to the top part. I spend a little more time on this area just because this is the part people see first. Don’t forget to keep curling away from your face. You want your curls to go the same way (for the most part).
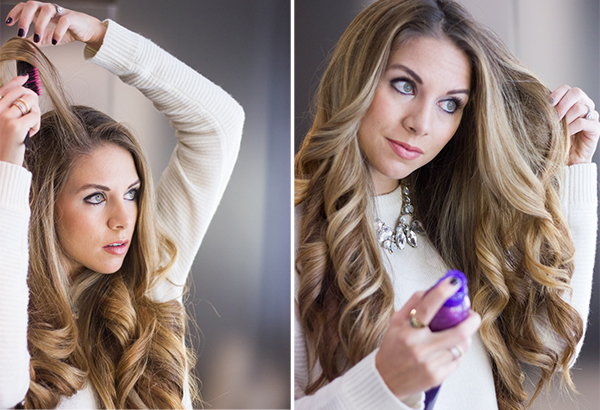
Step 5: By this step you should be finished curling your hair. I spend the last couple minutes trying to get a little more volume. I take the top layer on my hair and fold it over to the opposite side of my part. You don’t want to tease that top layer of your hair. It’s easy to notice and can also cause breakage at the root which is probably not what you are going for! Instead, I just add a little spray to that fold and then tease that next layer. After teasing at the crown, I start to separate my hair with my fingers. I keeping playing with it until I get looser curls. Spray with your favorite hairspray and you are good to go.

Shop the post: Wearing J Crew Side Zip Sweater (tts) | Shop Belina Trio Ring Set (save 20% with code LOVETD ) c/o | Baublebar Necklaces- Crystal Flurry Necklace and Gum Drop Strand c/o | Nails Deborah Lippman “Dark Side of the Moon” c/o | Lipstick YSL Lipstick #15 Coral Intuitive


You have the most GORGEOUS hair! Thanks for sharing!
The Style Storm
<3, Christina
Thanks or sharing ur tutorial is amazing
Such great tips for getting the perfect loose curls! I love your sweater that you’re wearing, too, and your necklace is the perfect pairing!
Liz
http://www.liztheaustinite.com
Love this tutorial! It’s always nice to see hairdos demistified!
http://www.tailoredandtrue.wordpress.com
You are so cute! Thanks for sharing this!!
Thank you for sharing! You always always have the best hair. I haven’t tried sleeping on it wet but I have heard to not straighten your hair before curling if you want the curl to stay. Please post more of these!
Thank you Sandy! It really does help, for me at least. It gives my hair a little grit so it really holds the curl. Try it and let me know how it goes!
Those necklaces are fab!
What temp do you set your curling iron on? Mine always leaves a clamp mark on my hair.
Hi Casey! I set mine on the highest heat setting (bad- I know!) I get the occasional clamp mark, but I find that it helps when I start mid shaft of the hair and work my way down. I don’t let it sit too long, I am constantly pushing down on the clamp so it can glide down and as it curls. I hope that makes sense!
Your hair is gorgeous! If only I had a third of your thickness.. haha.
Amanda
XO Strawberry Chic
The curls look so beautiful and effortless! Thanks for the tutorial!
Prudence
http://www.prudencepetitestyle.wordpress.com
I love tutorials like this! Not too much text but just enough to give us the details. You have the most beautiful hair! How did you get your hair to grow like that??
Hi Sarah! Thank you for your question. I use that 100 Proof Oil at night and a little before using heat and I really think it helps with preventing breakage. I also make sure my hairspray has some type of heat protection. Hope that helps! xx
Alright, I’m going to attempt this hairstyle… How well does it hold up at the end of the day? My hair is very fine and usually a gust of wind is all it takes to send it stick straight again despite my product pile up.
Hi Aimee! Thanks for your question. Mine actually holds up pretty well, when I let it air dry the night before. Even with recess duty, believe it or not! My hair is pretty textured though so that really helps. I really suggest doing the whole “air dry” thing and then using your favorite hairspray. Another thing you could consider is maybe try using less product? I worked at a salon (years ago) and they told us that people with fine hair should use less product than what you would think because it can weigh the hair down or do the opposite of what it is intended to do. It might be worth a shot! Thanks for reading xx
Beautiful, thanks for the tutorial! I have thick hair as well (not as thick as yours though!), and try sleeping with it wet in a bun, however it is still wet when I get up. Do you blow dry yours at all in the am or let the bun out and let it finish air drying? Thanks!
Hi Karie! Thank you! Yes, sometimes I have to do that, but if I shower earlier in the night it usually is 99% dry in the morning. I don’t like having to blow dry since I already put so much heat and color (!) on my hair. It’s nice to let it just air dry if possible. Hope this helps! Thank you for reading xx
Gorgeous pictures! Does this mean your beauty talks will start looking like this? I love tutorials when I get to see the person actually trying it or applying it 🙂 Great job!
Thank you, Catherine! My goal is to have a mix of these and my traditional ones with imagery of the actual product. My hope is that I can make these helpful to my reader! I really appreciate your feedback and thank you for reading!
Such a pretty post. I look forward to more hair tutorials!
Just discovered your blog and am loving your style and love, love, love your hair.
My question is, how often do you wash your hair? I am looking for tips on how to streamline my routine and love the night before washing. Plan on trying it.
Thank you so much for this!
Hi Ashley! Great question. I actually only wash my hair 2 maybe 3 times a week. I use a dry shampoo and that helps a lot!
thank you for the tutorial.
I really wish my hair would grow faster.
🙂
❤❤ Nybel
facebook | instagram | twitter
You have the loveliest hair! Thanks for the tutorial 🙂 xx
Fabulous. I love this and can’t wait to try it!
You should hairspray your hair before curling. That’ll fry your hair. You need to use a heat protectant that has hold like hot sets by redken -professional hairstylist
Hi Emily, Thank you for your comment. Thats definitely a good tip for more sensitive hair. We sold a ton of that spray when I was a stylist. The protectant in this bumble spray seems to be doing a good job for me and I like that it’s not as sticky. Have you tried the Orbie Soft Lacquer? I’ve heard really good things!
Hi,
Can you provide a little more in depth tutorial as to how you curl it once you clamp the hair! That would be so helpful! You have gorgeous hair!
Hi Ashley! I just found your site and it is amaze. 🙂 Would you consider doing a video tutorial for this loose curl styling? I always find the actual curling and arm motion difficult and awkward when doing my own hair. It’s hard to tell how to do it correctly with just photos and I always end up with wonky looking curls. Thanks for the great content and inspiration!
Thanks for sharing ur great hair tutorial u are super cute
Hi! Can you tell me who does your cut and color? I am in Dallas and looking for someone(s) new! Your hair is gorgeous! Thank you!!
Hi Elizabeth!
I go to Rachel at Salon Di Lusso. I’ve been going to her for years! xx Ashley
You have the most GORGEOUS hair! Thanks for sharing!