
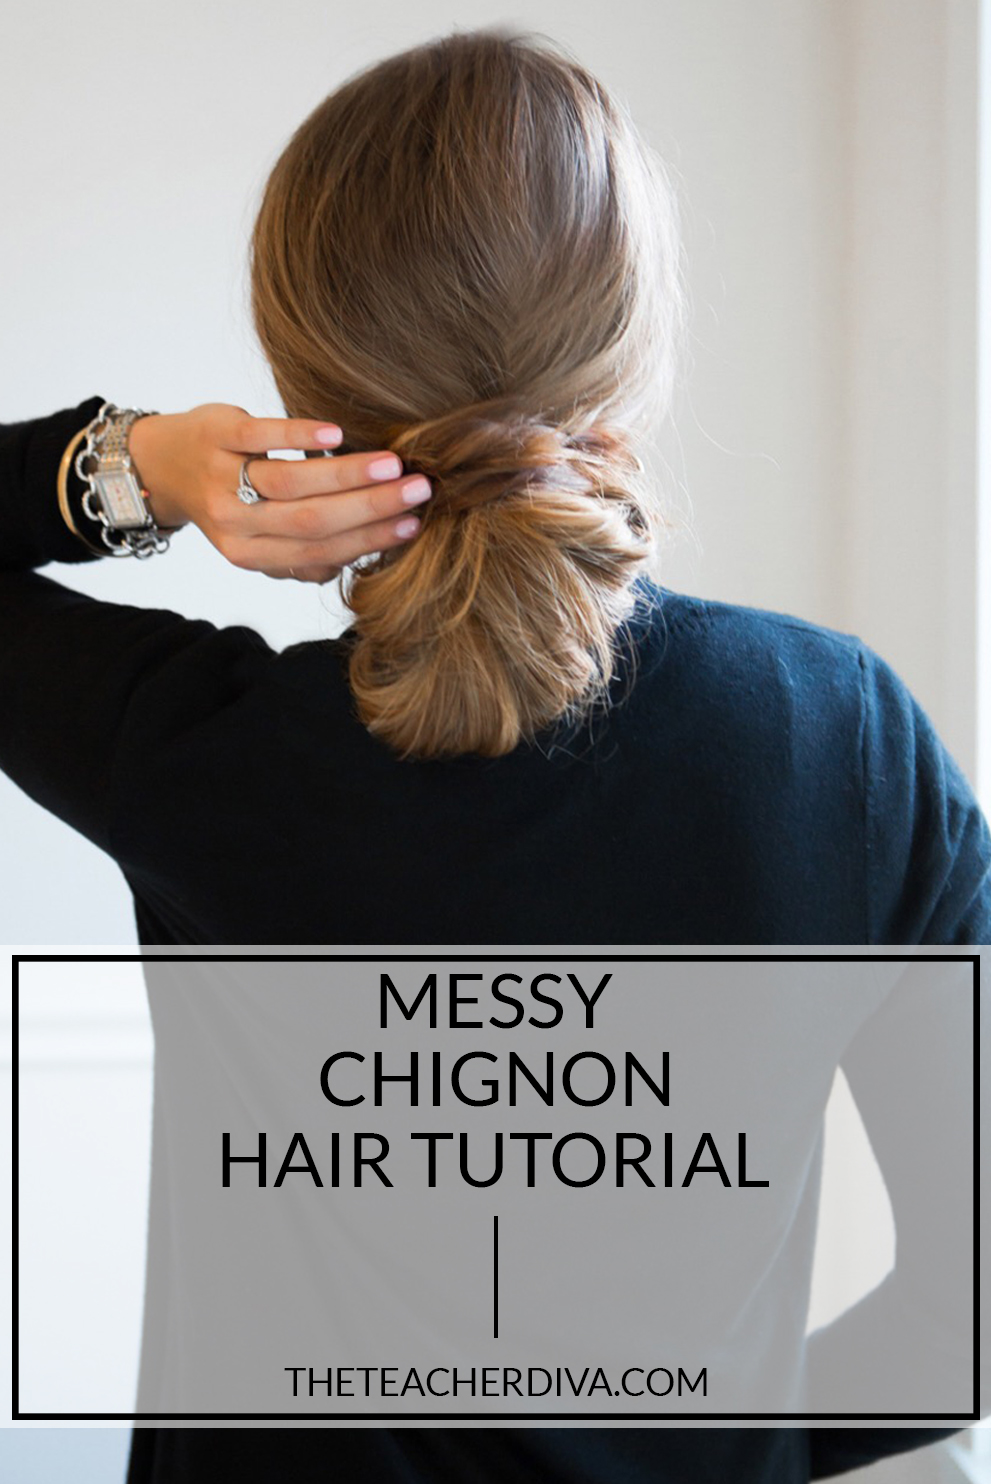
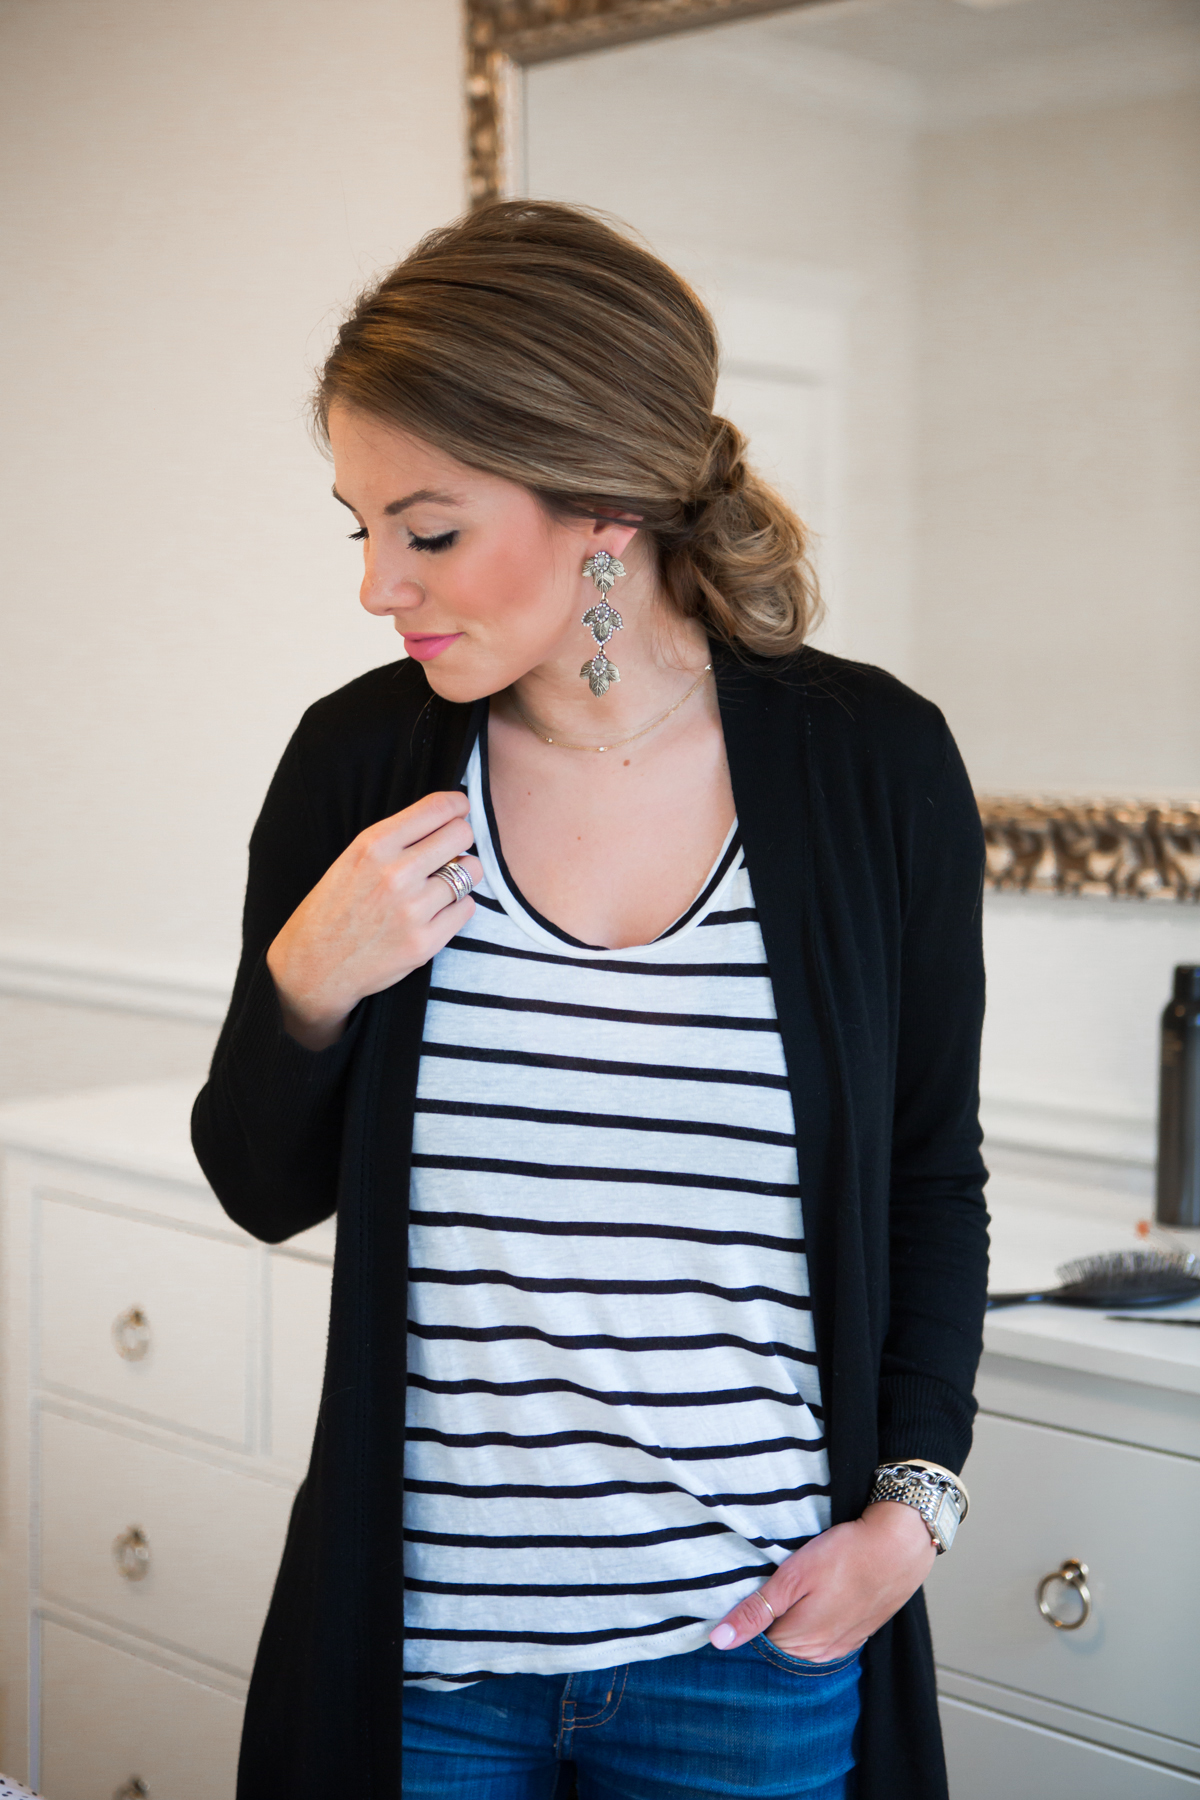
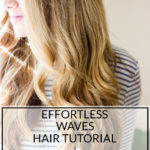
In honor of awards season, I wanted to share with you one of my favorite red carpet hairstyles, the classic chignon. I love this timeless style and find that it’s appropriate for many occasions. We’ve seen this style polished to perfection, but I wanted to share my take on a slightly messier version that I find chic and “effortless”. It’s actually pretty easy too!
Thanks for reading, and here’s to fabulous looking hair! xx
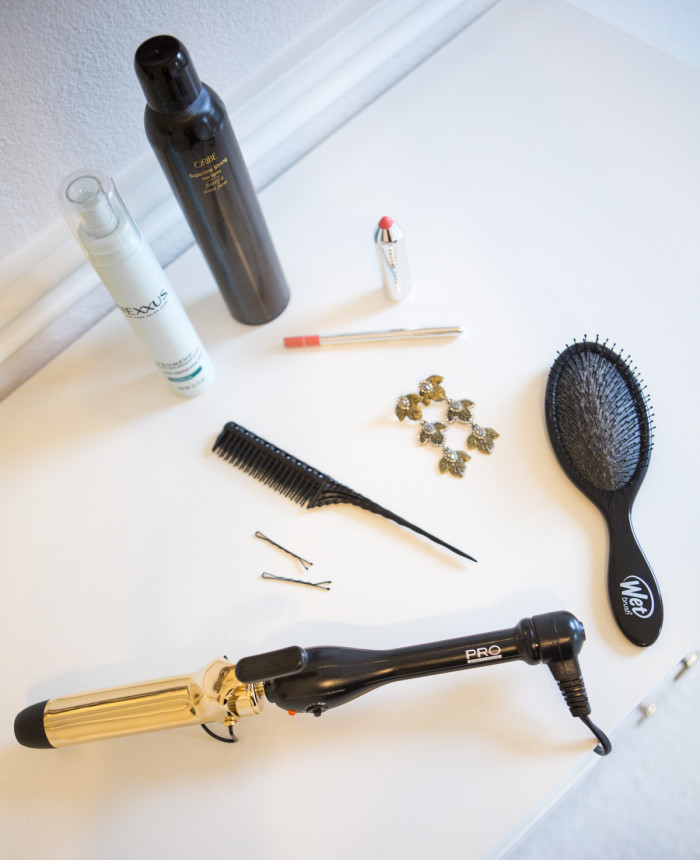
Products Used:
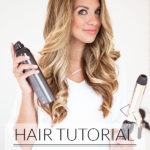
Pro Beauty Tools: 1 ¼” Professional Gold Curling Iron
Oribe: Superfine Strong Hairspray
Nexxus: Promend Heat Protectant
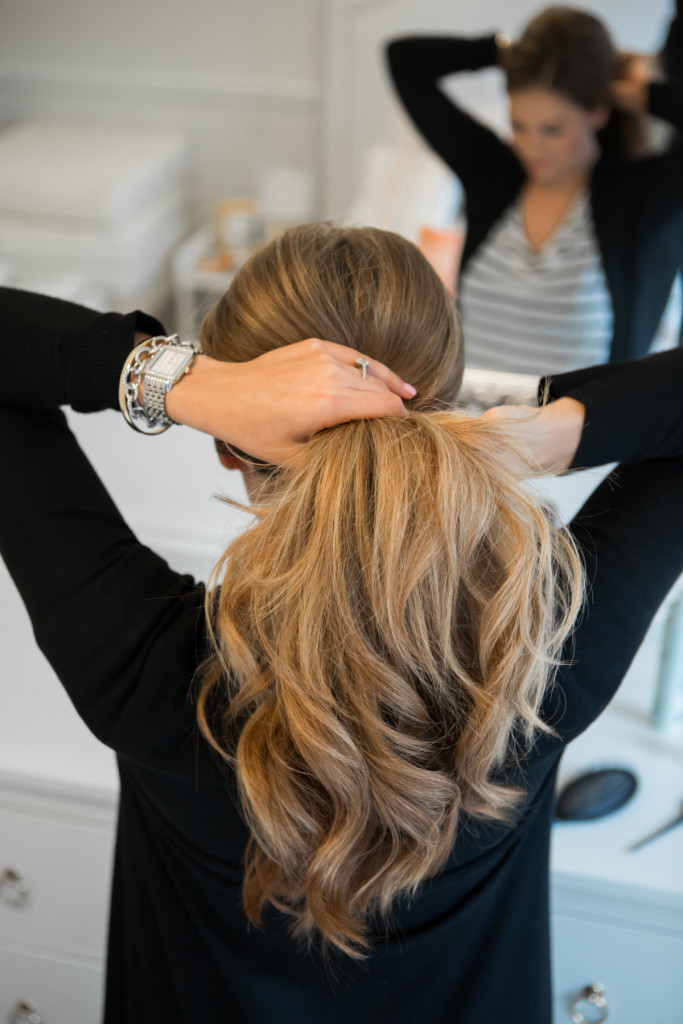
STEP ONE
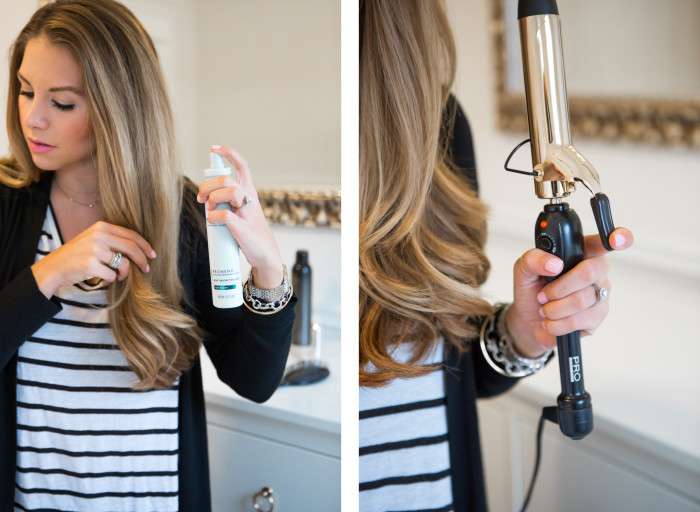
I find that day old hair works best for this updo, it gives the hair a little extra grit and volume when worn up. Start by throwing in a few curls with a 1 ¼” Professional Curling Iron. This curling iron is my favorite because I love the size (perfect for those loose curls) and it has a variety of heat settings, making it ideal for all hair types. The barrel is 24k gold plated, and the high heat of the curling iron gives me 24 hour, long lasting curls, which is perfect for a long night out. I am very picky when it comes to my hair appliances, and this one works great (and it’s under $30)!
Section hair into 2 ½ inch sections and apply this heat protecting spray. This will help keep moisture in the hair while using appliances like a blowdryer, curling iron or flat iron. Take each hair section & curl with a 1 ¼ inch barrel curling iron.
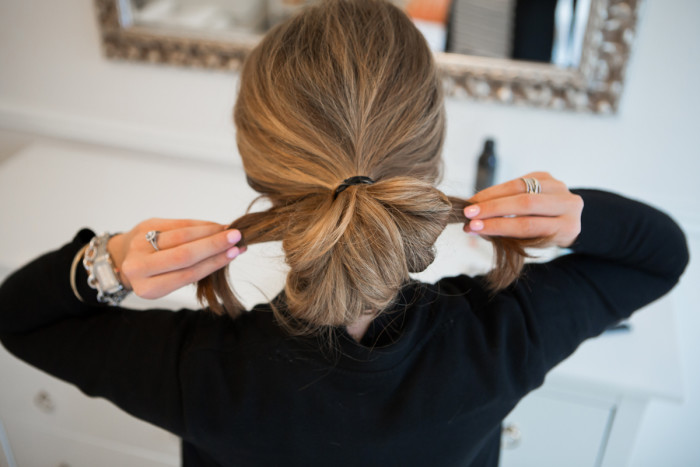
STEP TWO
Back comb or lightly tease each section at the root. Mist hair with a firm hold hair spray. I love the Superfine Mist by Oribe. After back combing & spraying, gently smooth any flyaways, and then finger comb the sections together.
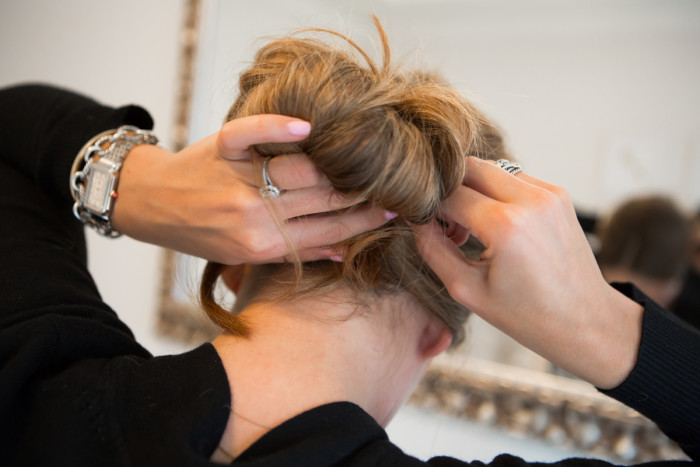
STEP THREE
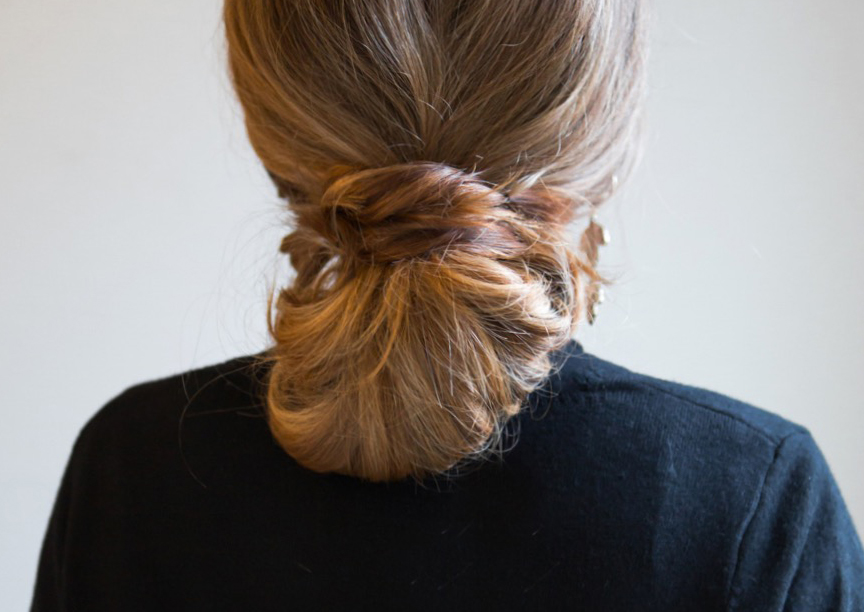
Gather the hair and use an elastic to pull your hair into a ponytail. You will wrap the elastic around your hair a few times but do not pull the hair through like a normal pony tail. You will want to create a small bun, with then ends of your hair not pulled completely through. Gently lift hair at the crown of your head to add extra volume.
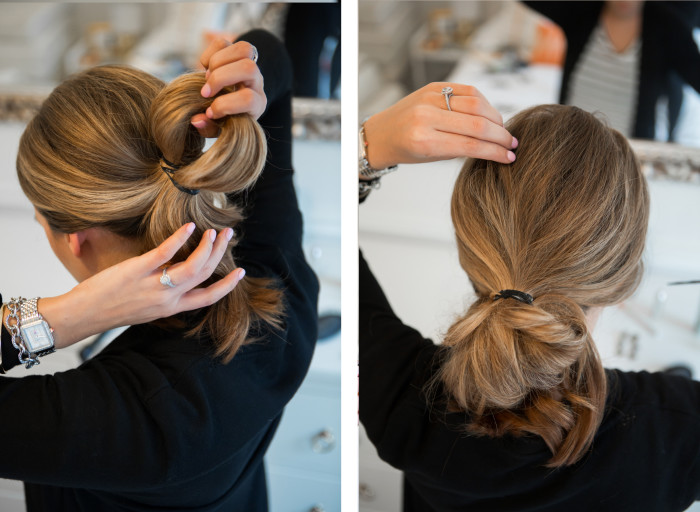
STEP FOUR
Take the ends that are sticking out and divide them into two sections. Wrap one side around the top of your bun, covering the elastic. Secure with a bobby pin or two. Don’t worry if your layers are starting to stick out, you can tweak it at the end or leave it if your prefer a messier style to your updo. Repeat with the second section.
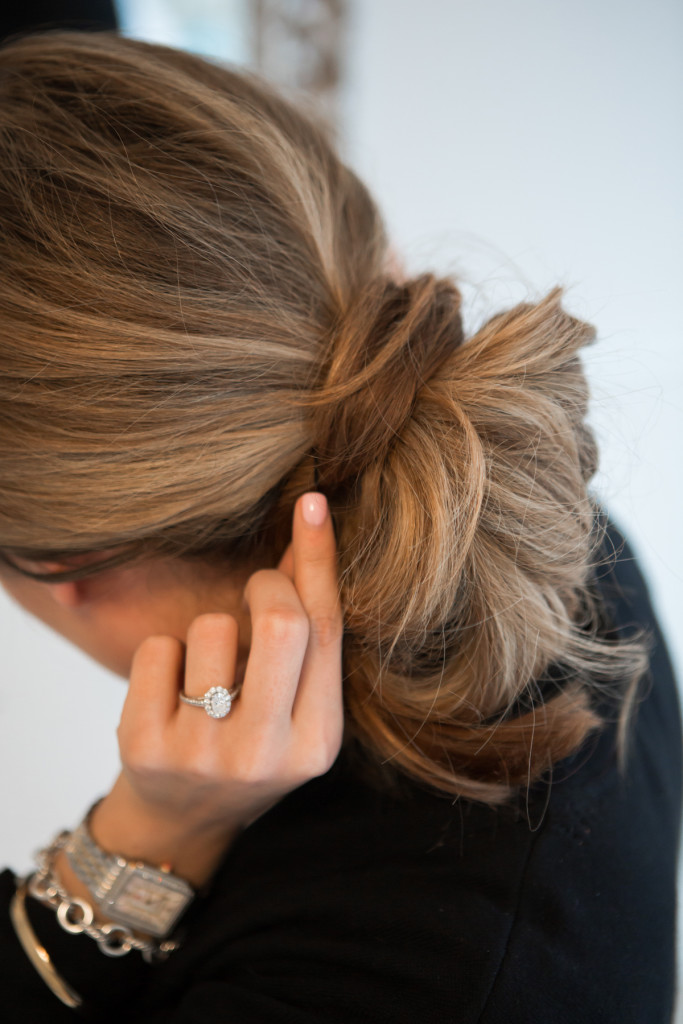
STEP FIVE
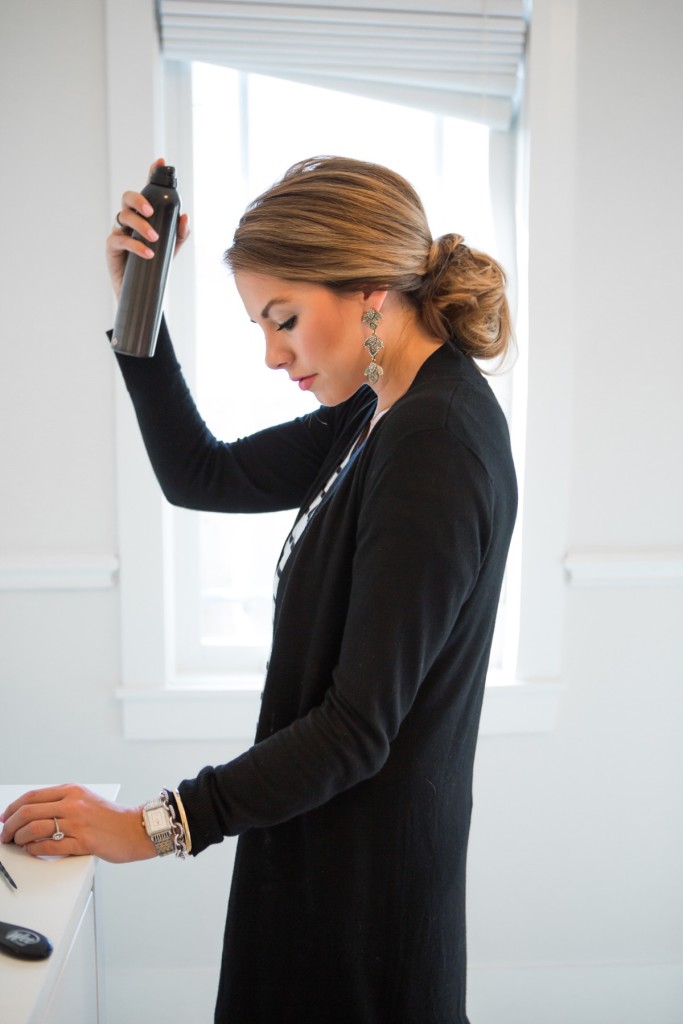
Use bobby pins to pin any hair that has fallen out of the bun. I just use a few, as I like mine to look a little “undone”. I like to go through one more time and gently lift the hair at the crown to add some extra volume. Finish with your favorite hairspray and you are all set!

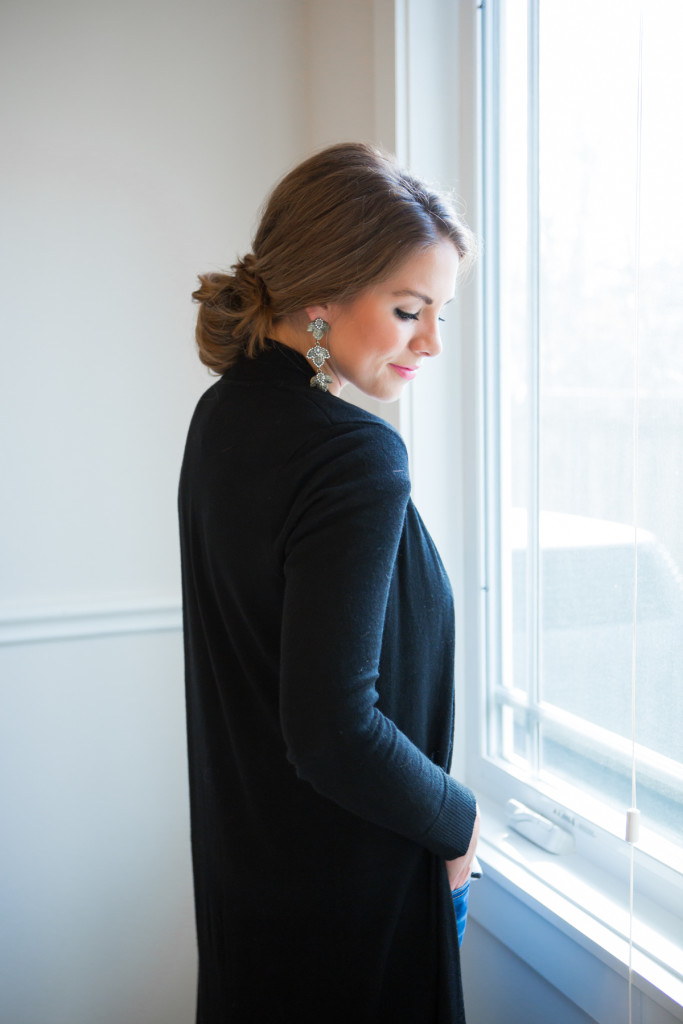
OUTFIT DETAILS: WHBM Black Duster Cardigan (also seen here // fit: tts) | similar Striped Shirt | Baublebar Statement Earrings (surprisingly these weren’t that heavy!) c/o | David Qumran Crossover Ring | Michele Deco II Watch c/o | Kate Spade Gold Bangle | Lipliner: “Honey(bun)” | Lipstick: “#600 Pow!” (obsessed with this duo…it has some serious staying power!)
![]()

Please feel free to reach out with questions or comments below!
Images by: Mary Summers
This post is in collaboration with Pro Beauty Tools. All opinions and selections are my own.
lovely, lovely look! you make hair-styling look easy-peasy, thanks for sharing, will definitely have a go!
I’m so obsessed with this chignon! So so beautiful!! I need to try to recreate this asap! xo
@stylemelauren
http://www.stylemelauren.com
Love the effortless look!
Liz @ ShoppingMyCloset.com
How nice!
This will be perfect for my job.
I think I am going to try it right now.
http://www.chicinitie.com
Oooh I’m excited to try this. It looks beautiful! xx
http://www.thatnewdress.com